NOTE: If you link, please let me know. I would just like to know where this is showing up.
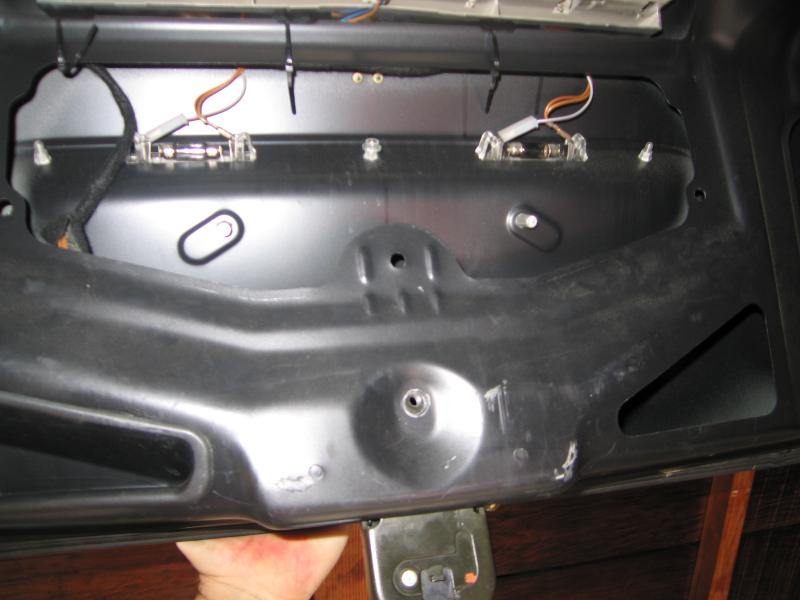
For the first step, I found that removing the access cover made this job easier. So, start by removing it.
Figure 1. Access cover removed
Next, you will want to loosen the trunk latch. This needs to happen because the linkage between the trunk lock/button and the latch will prohibit the removal of the lock assembly. You will need to realign the trunk latch upon reinstallation. I suggest that you outline the footprint of the latch to the metal lid to assist in realignment.
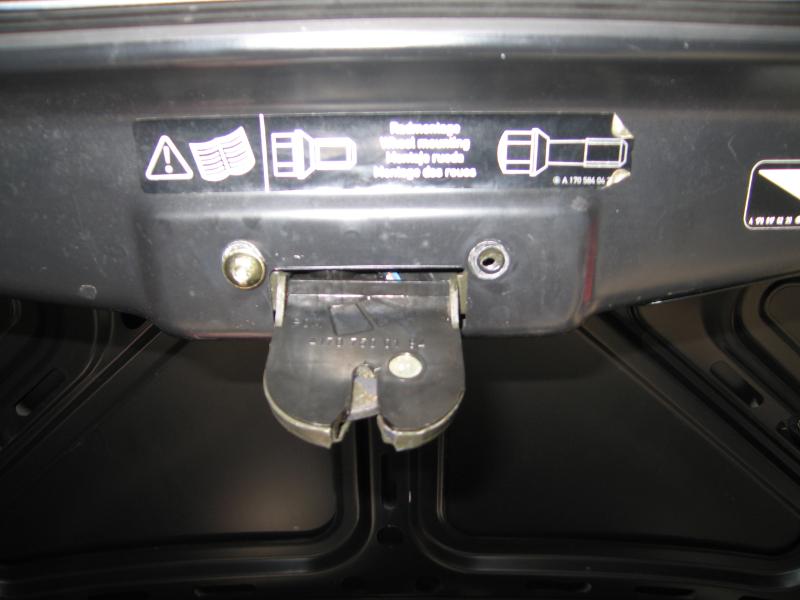
Figure 2. Loosen trunk latch
Now, you will be able to remove the lock assembly that contains the vacuum assembly that locks/unlocks the trunk.
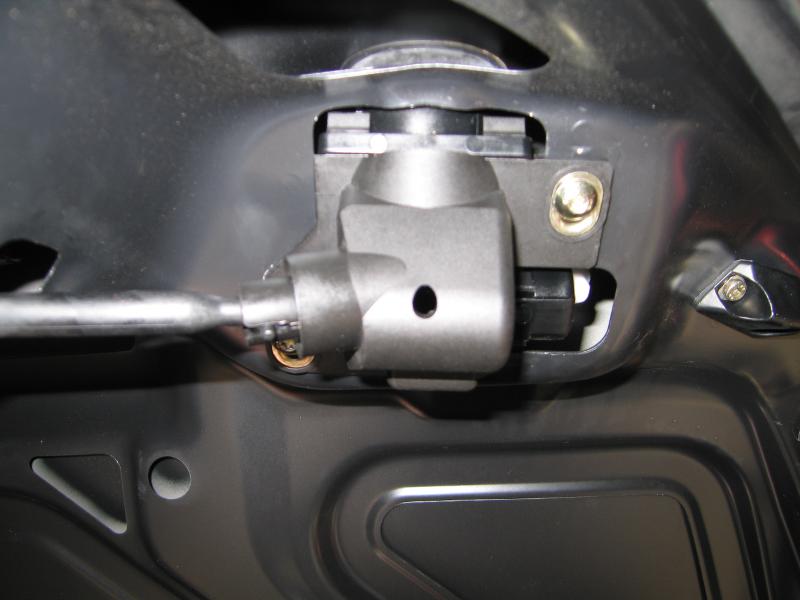
Figure 3. Lock assembly
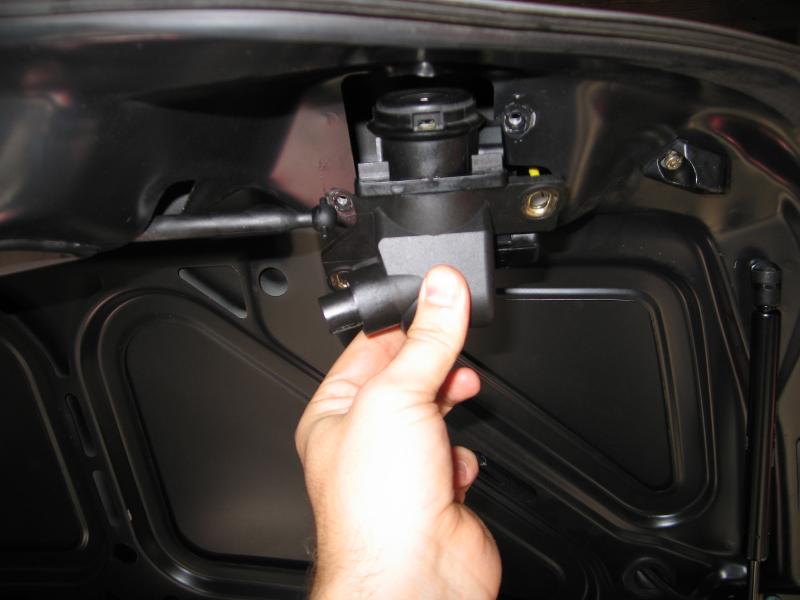
Figure 4. Lock assembly, loose linkage
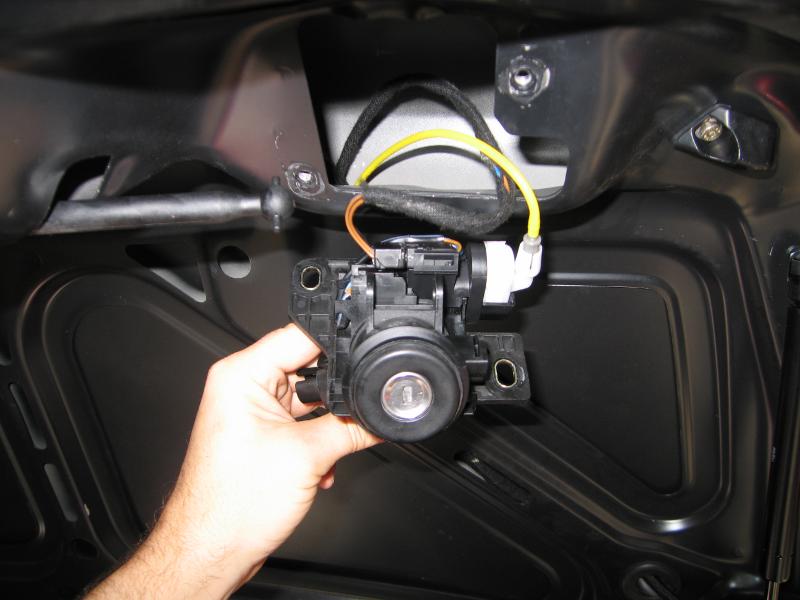
Figure 5. Lock assembly, alternate perspective
To disassemble the lock assembly, depress the latching tabs. As shown in Figure 6, they are located on the bottom side of the upper half of the assembly ( the large black piece on the right)
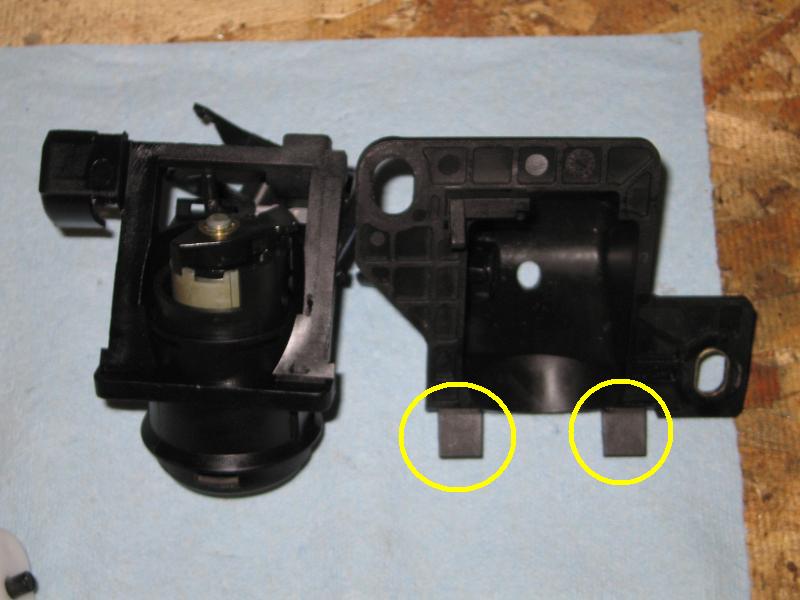
Figure 6. Lock assembly, disassembled
Locate the vacuum actuator as shown in Figure 7. In this figure, the new unit is in the top of the picture and the old unit is toward the bottom.
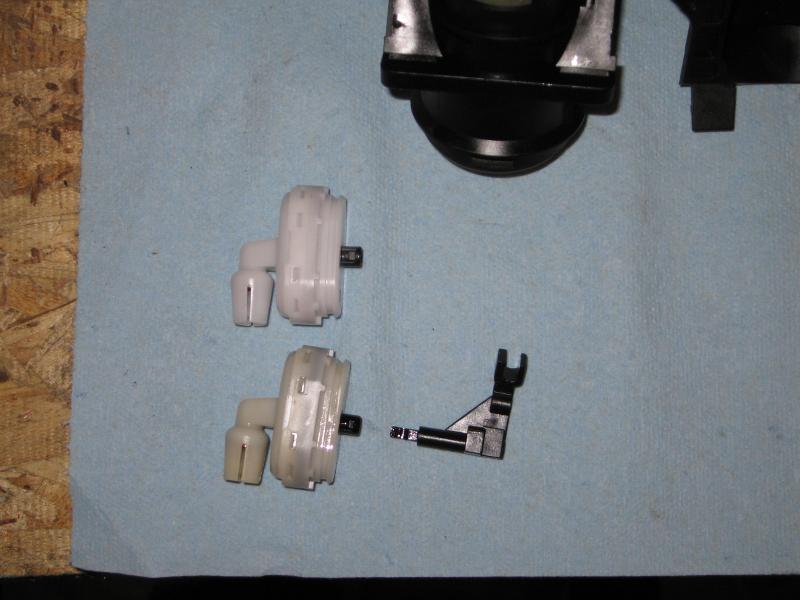
Figure 7. Vacuum actuator
Once installed, ensure the vacuum actuator linkage engages the locking mechanism. Figures 8 and 9 show the locked/unlocked position of the assembly.
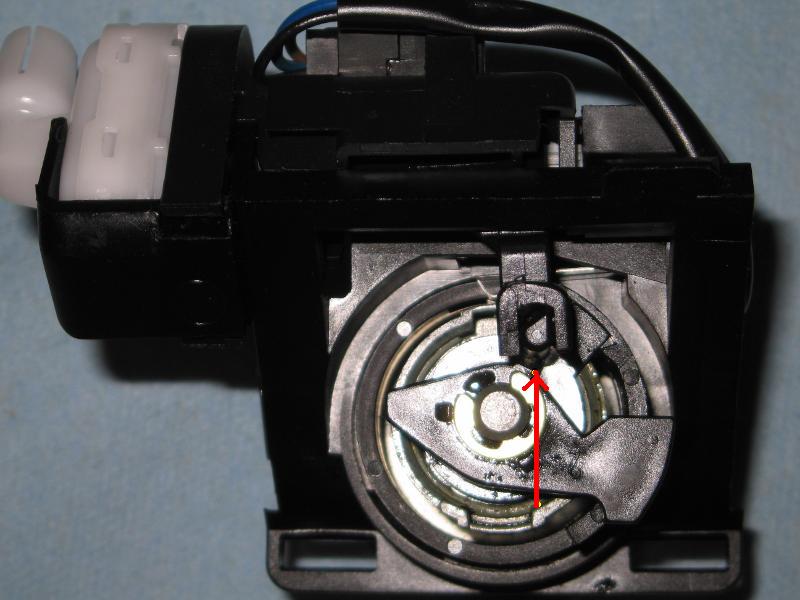
Figure 8. New actuator installed, position 1
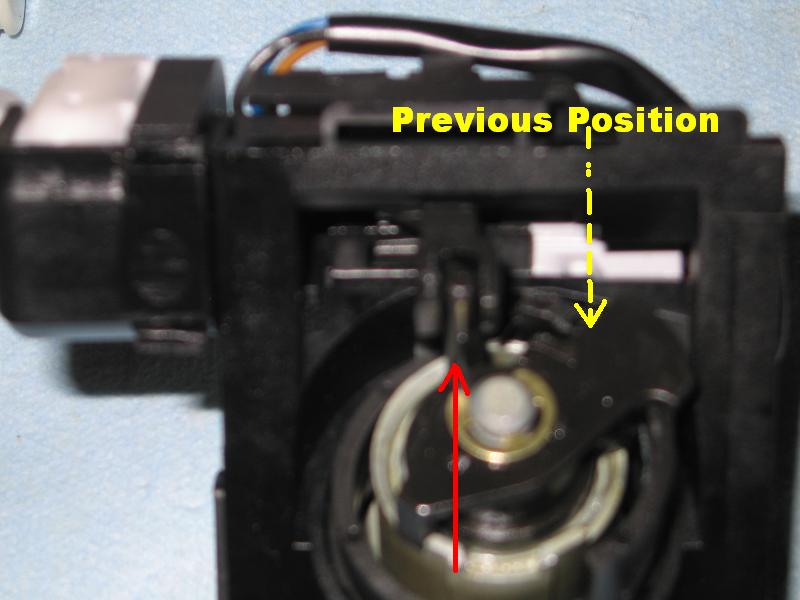
Figure 9. New actuator installed, position 2
Once it is verified that the vacuum actuator has been correctly installed and linkage engaged, reinstall all units in reverse order.
NOTE: Two alignment events need to happen on the reinstallation: the trunk latch, and the lock assembly. From the beginning, you should have outlined the trunk latch, so the realignment there should be easy. The alignment of the lock assembly was trickier, and required more of an 'eyeballing' of the alignment. I tried to capture a correct alignment in Figure 10. The perspective is shot along the surface of the trunk, from bottom towards the top. I tried to show the correct outward extension the button should have from the black bezel. The yellow lines are trying to show that the button should not be flush with the black bezel.
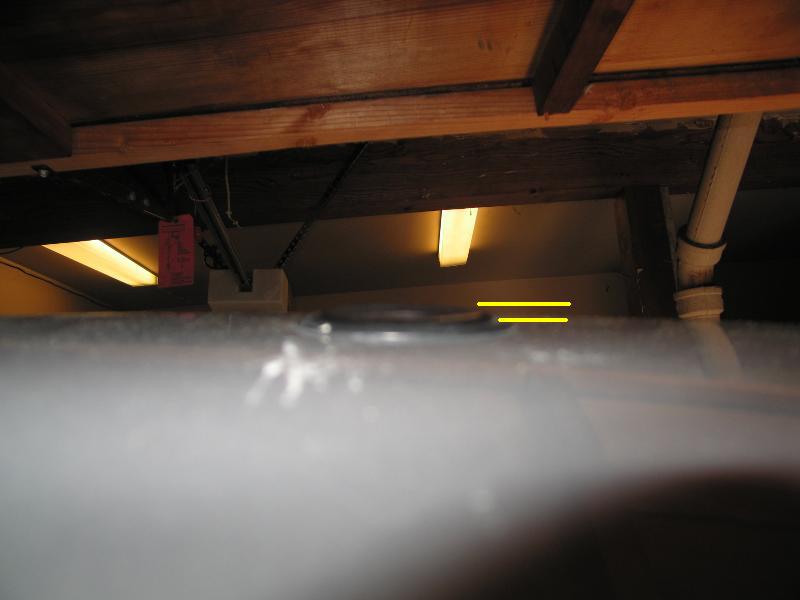
Figure 10. Lock button assembly alignment
Last updated November 20th, 2010 - Copyright Enfinicorp.
Page maintained by: benkokes@hotmail.com