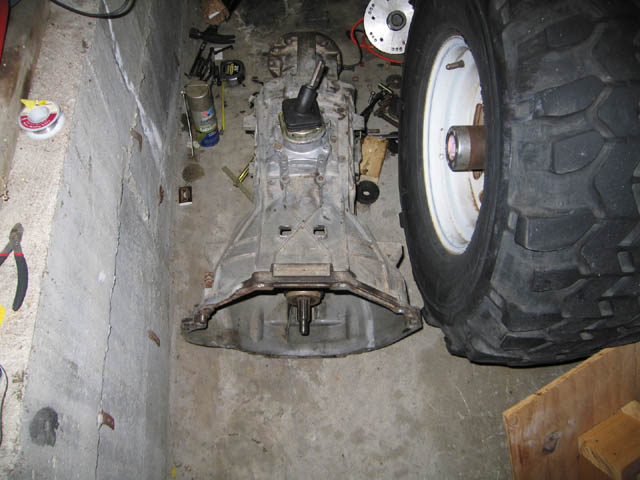
Overall picture of the ZF Transmission
Welcome to Ben's ZF Installation Addendum!
As always, this page is under construction.
NOTE: If you link, please let me know. I would just like to know where this is showing up.
Earlier this year, I decided to accept the challenge and install a ZF transmission into my Classic Bronco. The vehicle originally came with a C4 3 speed automatic transmission. After destroying 2 of those, I decided to put in a Borg Warner T-18 transmission. A bulletproof unit for sure, I drove that for 10 years with absolutely zero problems. I am sure I could drive over landmines with it and not even scratch the surface. After about 10 years of serious-near-double-clutching, I felt it was time for a change. and overdrive. So I asked around and found a used unit on www.classicbroncos.com for $400. Thats right $400. Another gentleman had the adapter with spudshaft for $325. SO (after shipping, taxes and kind words), I have the basics for UNDER $900. A deal to be sure. Add in BC Broncos (www.bcbroncos.com) hydraulic clutch kit and I was ready to go.
This page is intended to be an addendum to Joe Lougee's page which is located at ( http://pages.prodigy.net/rjlougee/ZFInstall.html ). I will be asking him shortly if I can copy his content to make a more complete installation guide. I just noticed on his site that he may have left out some crucial information. But no matter, I took pictures of my experiences and hopefully they will help you with your installation. Since not all kits or transmissions are made the same, I had to do some creative modification on the unit that I have.not a problem really, I just wish I had that info before I started.
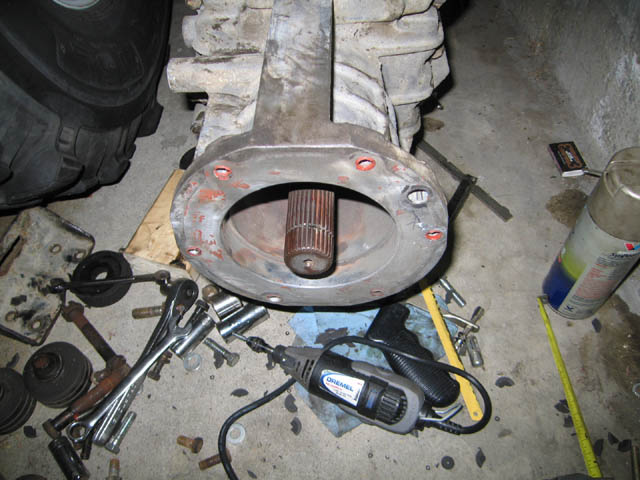
Overall picture of the ZF Transmission |
|
As shown above, this is a standard ZF Transmission. Notice the throwout bearing on the input shaft. I decided to install a new slave-cylinder which has a new throw-out bearing attached.
Adapter Width - 2-5/16" |
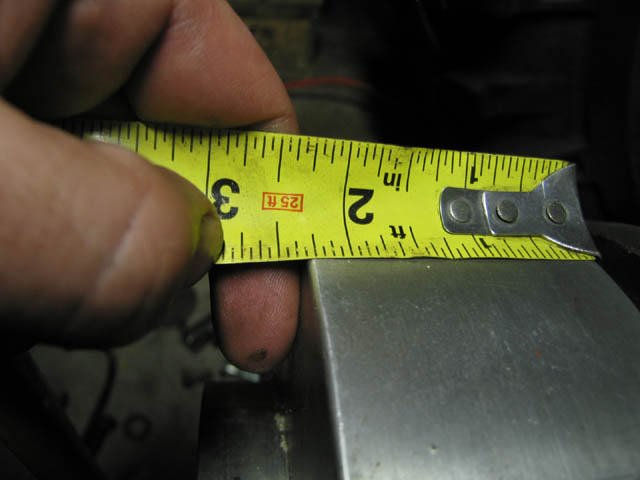 |
This is inportant to note because some of the adapters seem to be thinner. I had to make a return trip to the hardware store to get the 3" allen-head bolts for this thing. The bolts specified to mate this to the Dana 20 in Joe's writeup are too short for this adapter.
Spud shaft length - 1 5/16" |
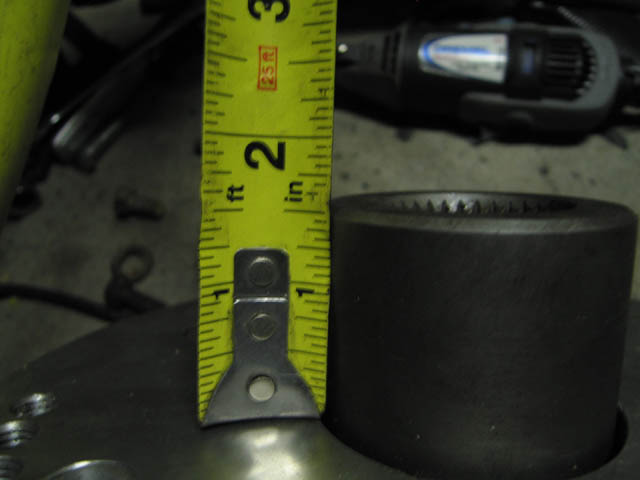 |
I am unsure of the length on the current kits, but with the adapter and spudshaft fully assembled, it sticks out just shy over 1-5/16" .
adapter space - 3/4" |
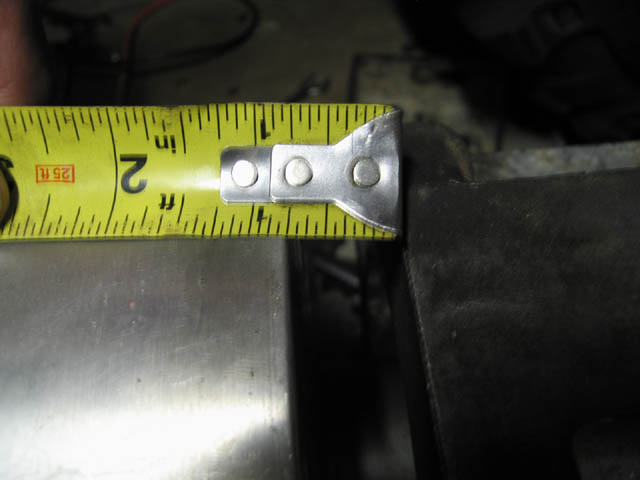 |
At this point, I had a sinking feeling in my stomach. The output shaft is too long by what appears to be 3/4 of an inch.
Cut output shaft 7/8" |
 |
Since there was a 3/4-inch space between the adapter and the body of the transmission, the shaft needed to be cut. I decided to cut about 7/8" off of the output shaft to make sure that everything would fit up snugly. I used the large-diameter (5 to a package) cut-off wheels for my Dremel. Expect to break 5 of them while cutting. It took a good hour and a half to get through, and even then, the radius of the cut-off wheel was smaller than the diameter of the shaft. So it took a big-pry bar and some back-and-forth working to liberate the cut off piece from the rest of the shaft. Dont even try a hacksaw ( as pictured ) The hardened shaft will just laugh at the blade.
Cut tunnel housing for shifter tower |
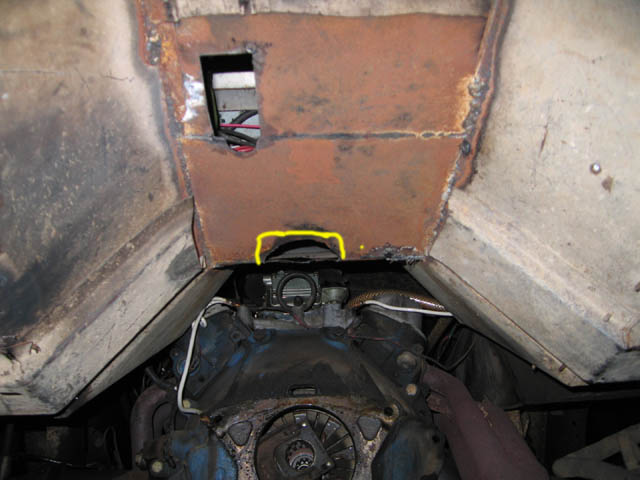 |
Even though I have a 3" body lift, the shifter tower just *barely* interferes with the tunnel. Even though I have a hole there for the previous shifter tower ( from the T-18), the hole needed to be cut an extra 3 inches toward the back to assist in install. The yellow shows where I made the cut. As you can see in this picture, I have not removed the bell housing, fork, and throw-out bearing. These will need to be removed prior to install of the ZF.
The rest of the installation went as Joe's install page said it would. This was a one-man-job for me, so I got a transmission jack from Harbor Freight (www.harborfreight.com) which made install tons easier. I made my own crossmember because I am putting in a PTO winch, and the BC Broncos crossmember will interfere with the output shaft to the winch in the front. My first experimental crossmember does not have the provisions for this yet, but when I get time to re-weld it, I will post pictures.
Hopefully you found this helpful and I will be making updates as needed. Should you find that you have questions, please email me at benkokes@hotmail.com.
Updated June 15, 2006 - benkokes@hotmail.com