| Top | 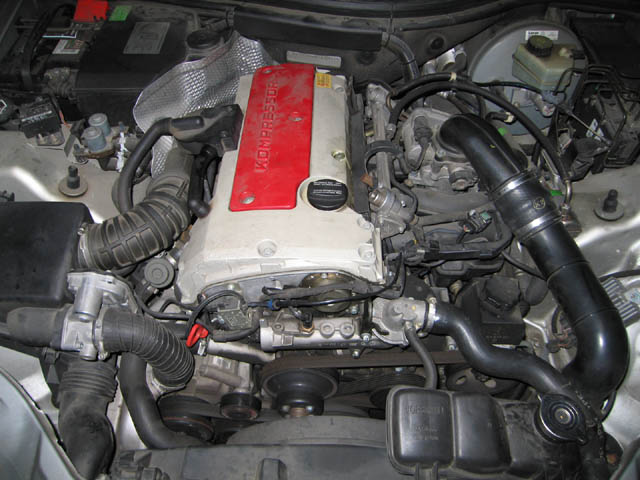 |
| Left(driver) |  |
| Right(passenger) |  |
1998 Mercedes Benz SLK 230 Head Gasket Remove & Replace
This page is always under construction.
NOTE: If you link, please let me know. I would just like to know where this is showing up.
About 2 months ago, the SLK would have a rough start. After about 10-15 seconds and a little revving, the engine would smoothen out and drive normally. Occasionally the Check Engine Light (CEL) would illuminate and would store the code for Cylinder 4 misfire. I originally thought it to be an ignition coil malfunction, but pulling the sparkplug for cylinder 4 showed a wet cylinder and cracked/broken insulation around the center electrode. The cooling system retained pressure and there was no signs of water in the oil.
The only recourse is to remove the cylinder head and check out that is going on with the cylinder head gasket. It was the leading suspect for the problems.
This webpage is intended to pictorially show my removal of the cylinder head, the preparation of the block surface, and replacement of the head and associated hardware removed by necessity. I followed the instructions on AllData (www.alldatadiy.com) AND also found a shop manual. This removal order worked for me, and should work for you. I would rate my skill as an experienced amateur, meaning I have rebuilt engines and transmissions before on classic vehicles. It took me around 5-6 hours to do the removal.
| Top | |
| Left(driver) | |
| Right(passenger) | |
The hoses were really stuck on from being clamped down for several years. It will take a little patience to remove them. I used a screwdriver... OH! and don't forget to drain the coolant
Removal of the coolant reservoir |
 |
Remove Breather |
 |
Remove Air-Cleaner box |
 |
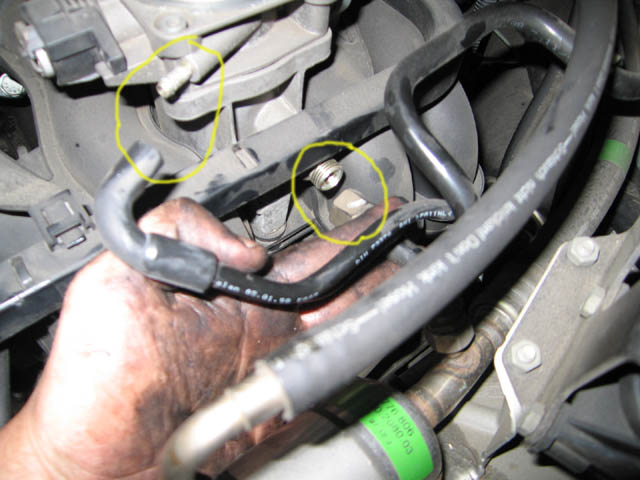
Remove Air Solenoid |
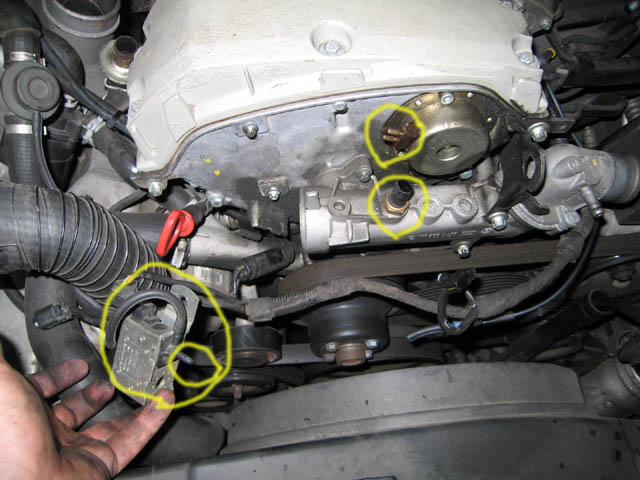 |
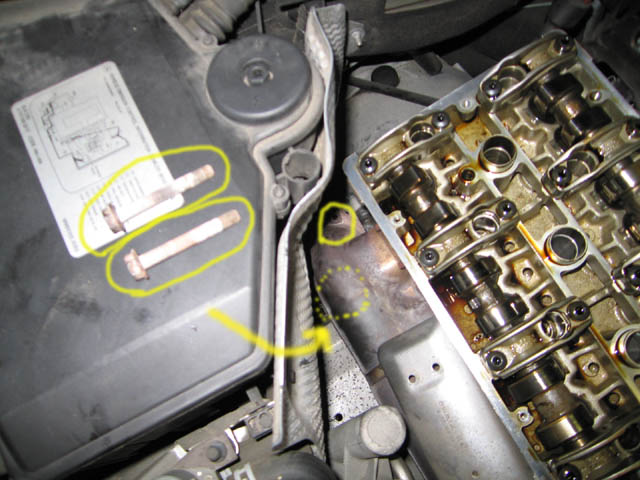
Remove the solenoid. I replaced its mounting bolts back into the block so as to not loose them. At this point, disconnect the Camshaft adjuster and the temperature sensor.
| Thermostat assembly | 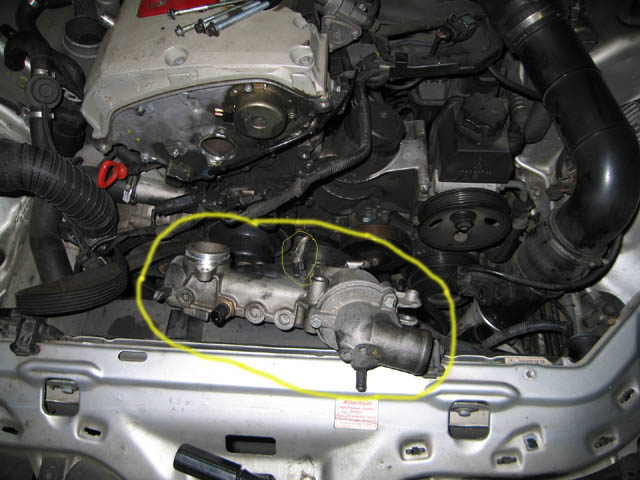 |
| O-Ring placement | 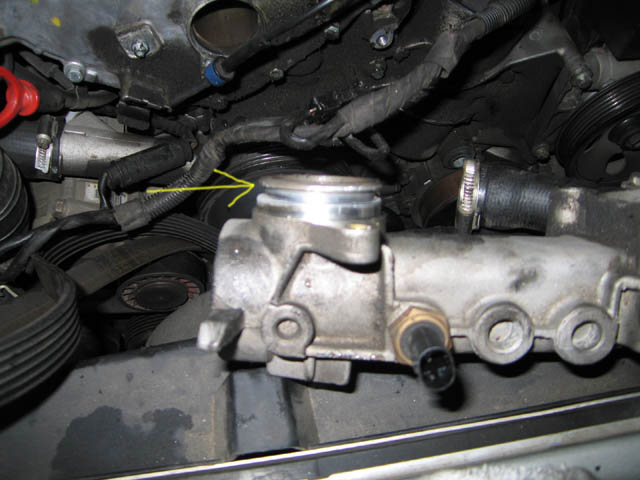 |
Removing the thermostat housing requires a little negotiating. The housing fits into the head and has an O-Ring that makes removed a little stiff. As you can see in the second picture, a groove for an o-ring is shown, but when I removed mine, it flung out, never to be seen again... No worries, the kit has a new one.
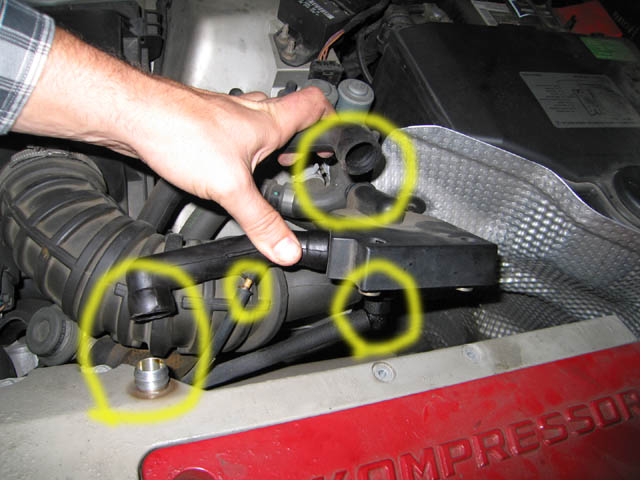
| Remove Intake Tube. |
 |
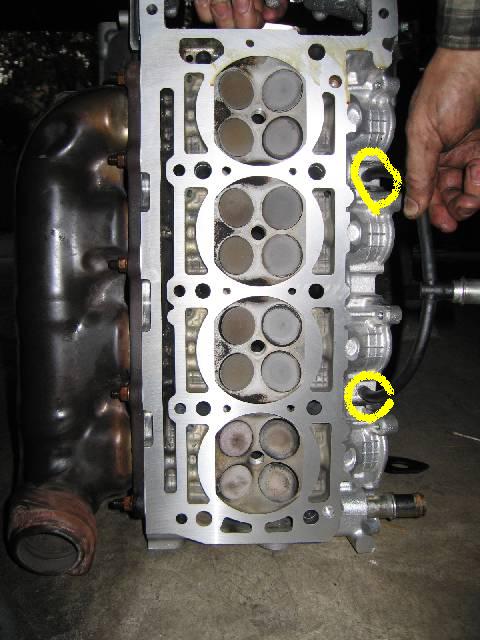
At the top where circled, there are 3 Allen-head bolts. the fourth is 'hidden' under the tube. remove the 3 bolts, and the clips at the other end of the tube (attaching the Mass Airflow Sensor<MAS> to the Intercooler). The assembly should just slide out with a bit of effort. Do not forget to remove the Zip ties attaching the MAS wire to the black intake tube.
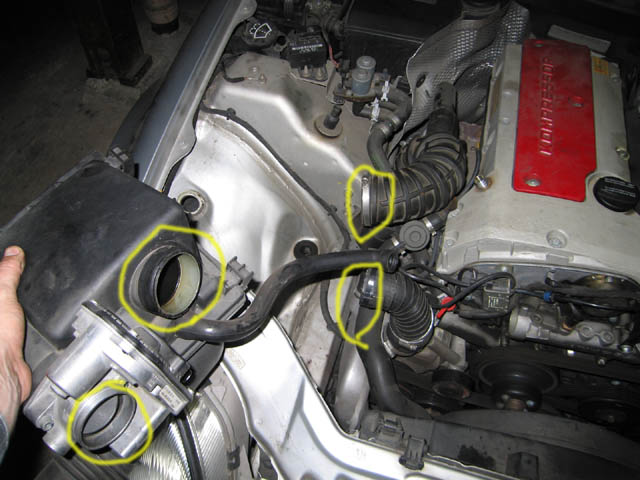
Intake Vacuum tubes |
 |
Remove rigid plastic vacuum tubes from Intake manifold.
| Awkward intake bolt | 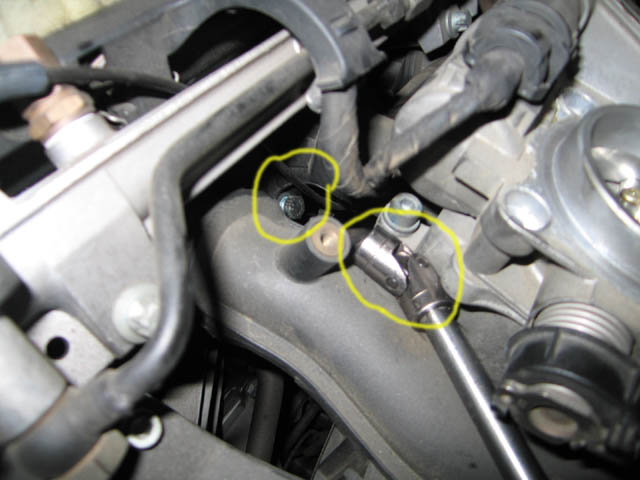 |
| Upper intake bolt |  |
This threw me for a loop for about 5 minutes. The first picture shows an awkward positioning for an intake bolt. This one shown and the lower-rear most bolt were difficult to reach. I recommend having a flexible socket as shown. The upper intake bolts were a surprise, but they need to be removed to take off the entire intake assembly. The intake butterfly valve assembly does NOT need to be removed.
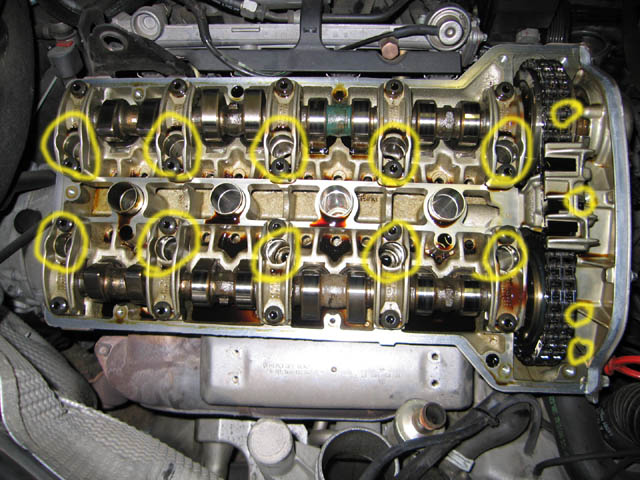
Remove valve cover |
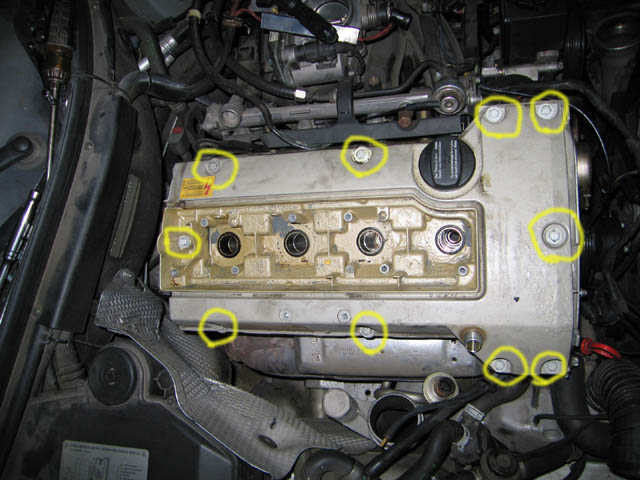 |
This shows the locations of the bolts that need to be removed to remove the valve cover. DO NOT pry this cover off. Just be patient and rock from side-to-side. It WILL budge.
| Top of the head | 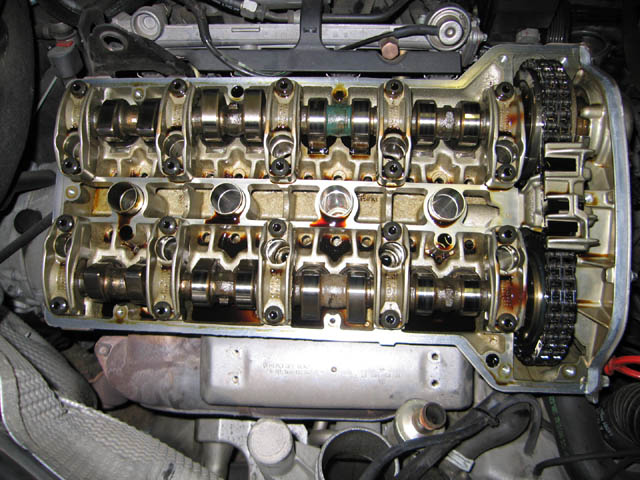 |
| Front of the Head |  |
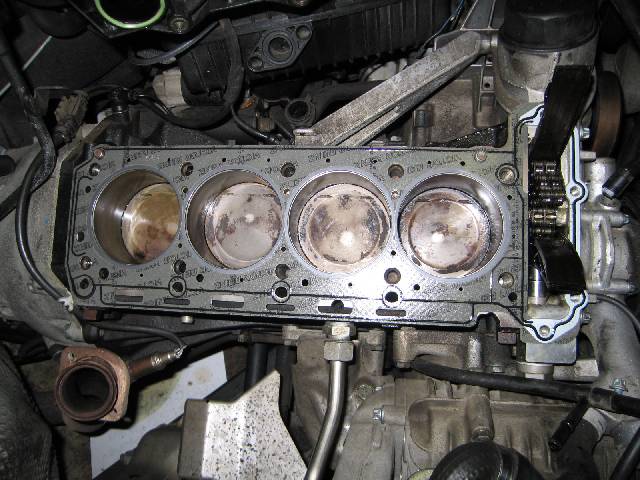
Cylinder head before removal of components.
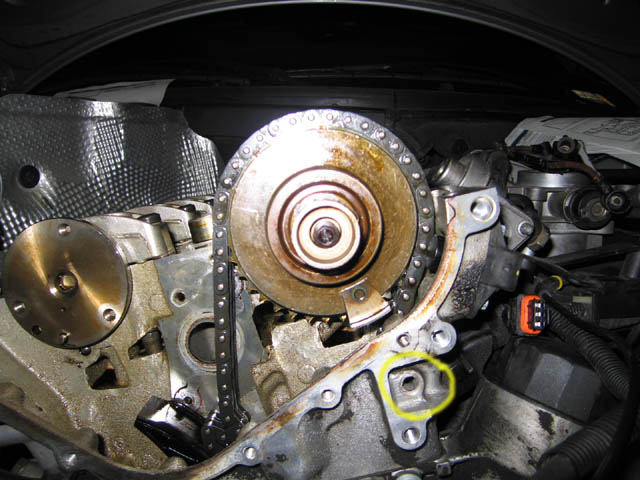
| Timing chain cover removal | 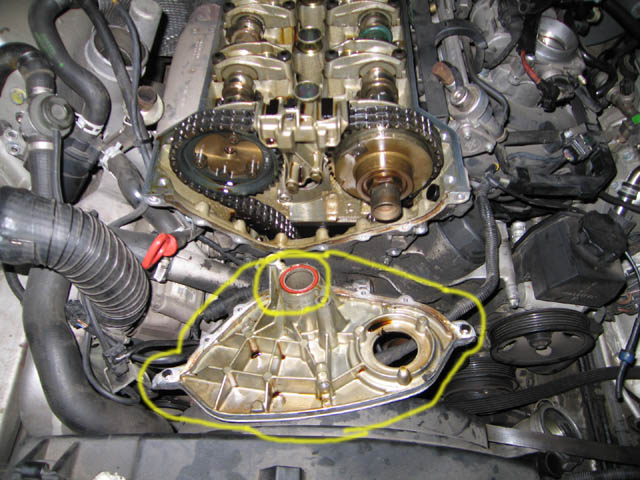 |
| Timing chain cover bolt positions | 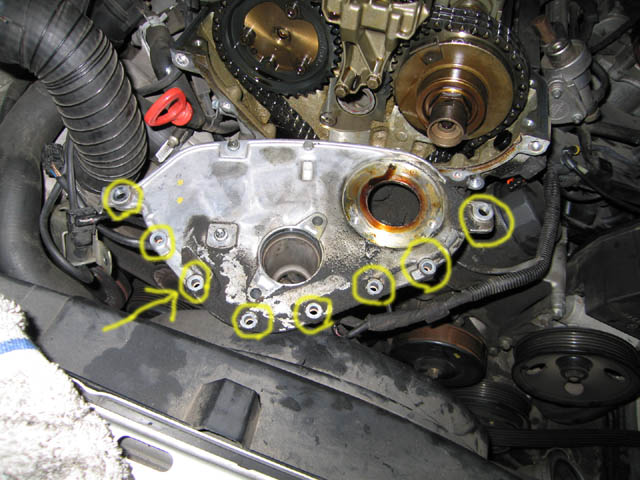 |
Removal of the timing chain cover is straightforward. There is one "hidden" bolt, the 3rd from left. It is under the little protrusion used to mount the clip for the supercharger electrical connection. Note the orange O-Ring in the first picture, it will be replaced with a new o-ring included in the head gasket kit.
| Timing Chain, Front | 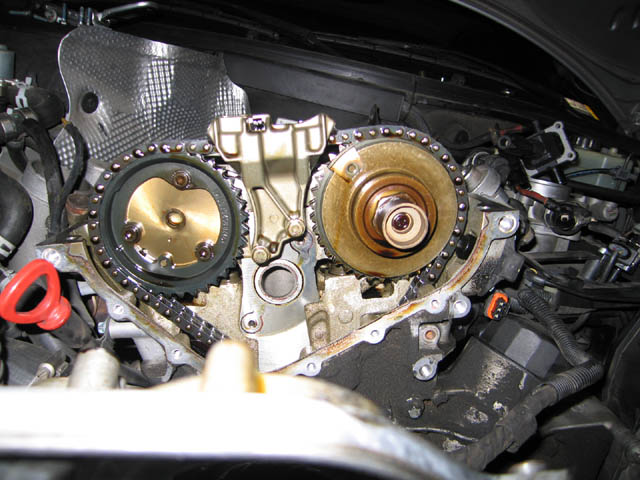 |
| Timing chain, towards crankshaft | 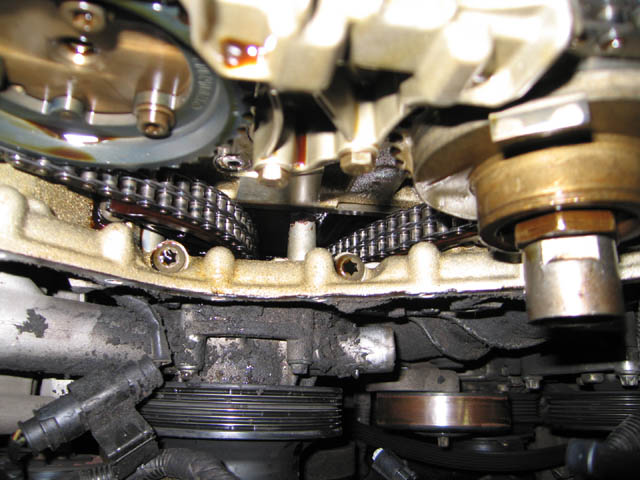 |
Picture of timing chain before removal of camshaft gears.
| Intake camshaft gear alignment mark | 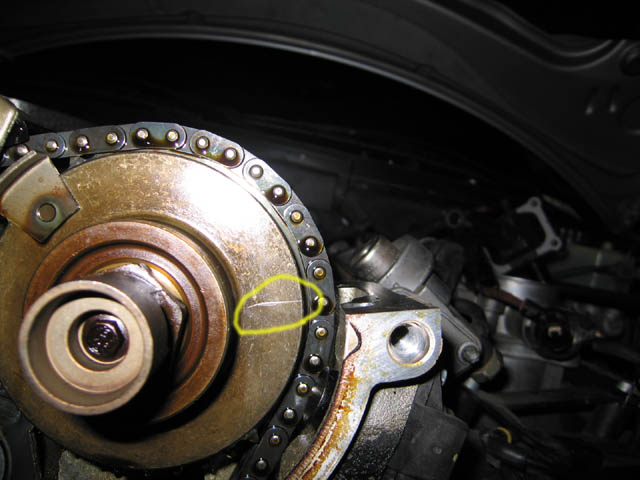 |
| Exhaust camshaft gear alignment mark | 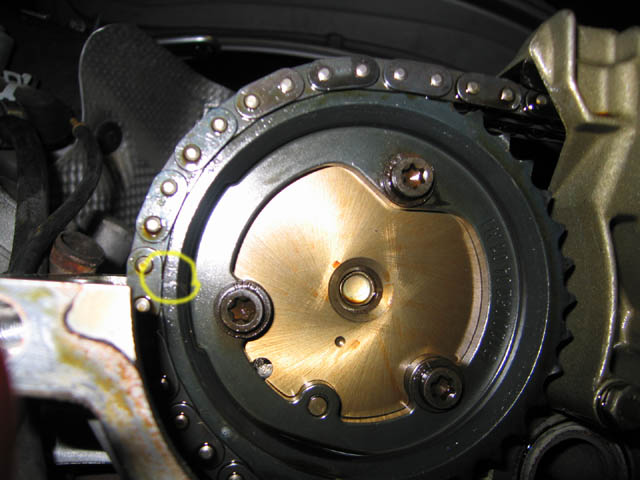 |
Be sure to mark the camshaft location when removing the head. The guides suggest zip-tying the gear to the chain to ensure proper alignment when reinstalling. I was replacing my chain, so I only aligned the gears to the block.
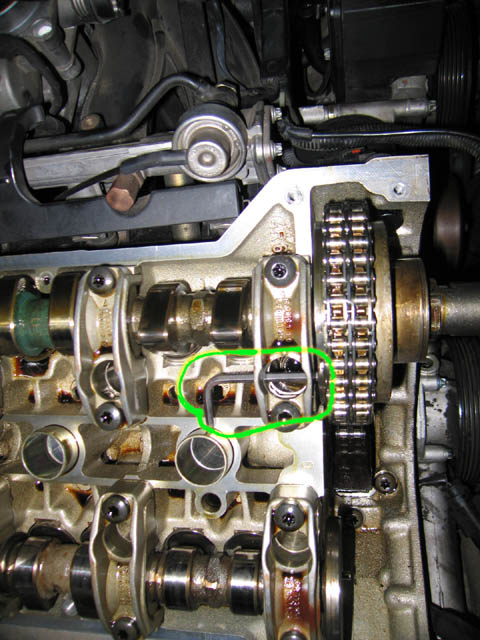
Removal of top chain tensioner |
 |
Top chain tensioner. Two bolts attach it to the head.
Cam Positions |
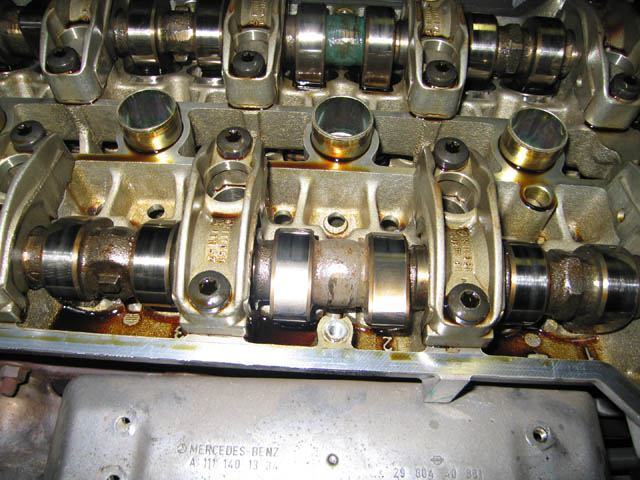 |
Cam positions. I took a picture to help realignment when I install a new timing chain. If you are only replacing the head gasket, you probably don't need to worry about taking a picture.
Guide Pin |
 |
A slide hammer is required to remove this pin. Its for the drivers-side timing chain guide. If you do not remove it, you cannot access the head-bolt that is directly under it. EVEN if you were, the guide pin goes through the chain guide, so you couldn't lift the cylinder head off the block. It is a required removal. I got my slide hammer from Kragen and used a bolt from the cam adjuster. It stuck for a few jolts, but came right out when it started moving.
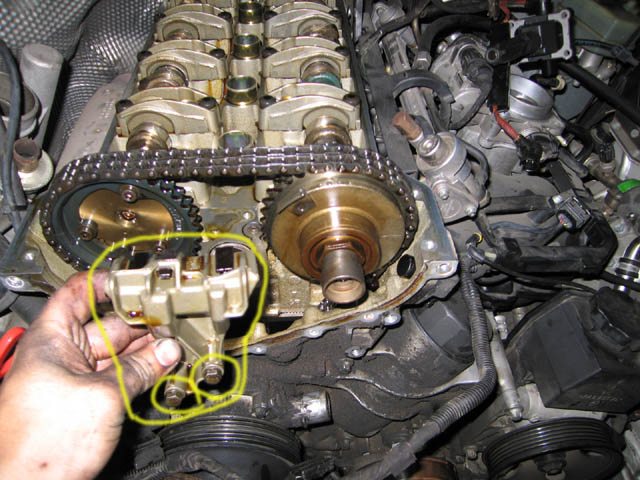
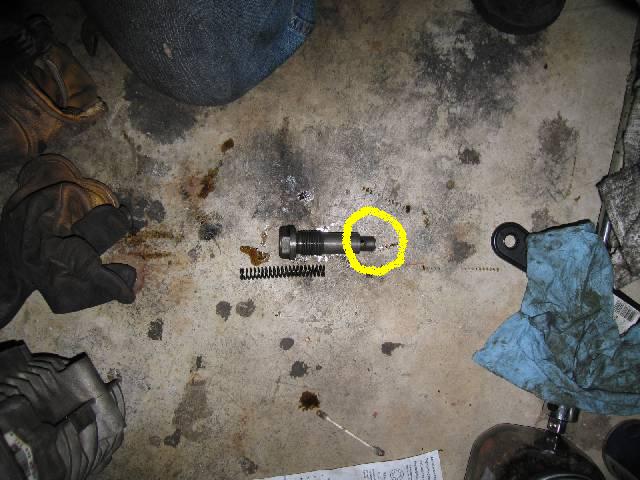
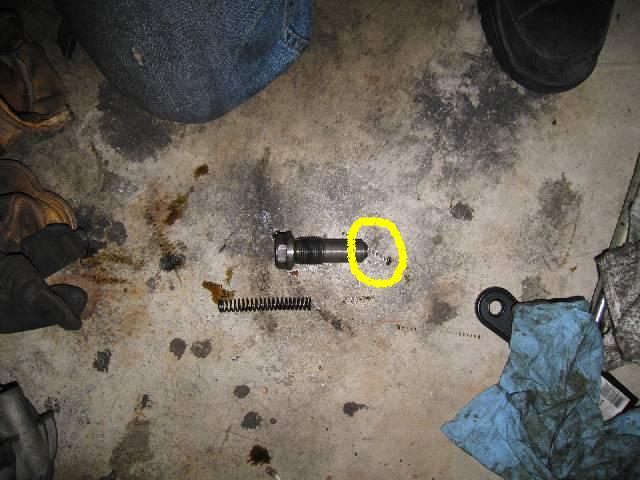
| Intake cam gear lock. |
 |
To remove the intake cam gear, you need to lock it in place. I used an Allen key. There are 2 possible holes on the gear head. One is slightly offset and the other is dead on aligned, they are separated by about 30-degrees.
| Intake Cam gear | 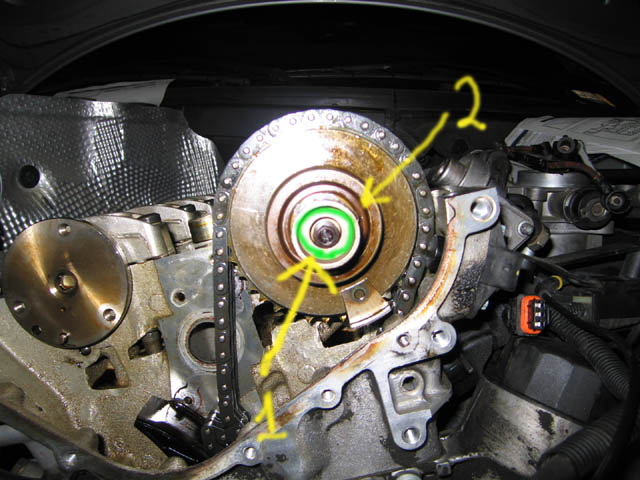 |
| Front bolt removed | 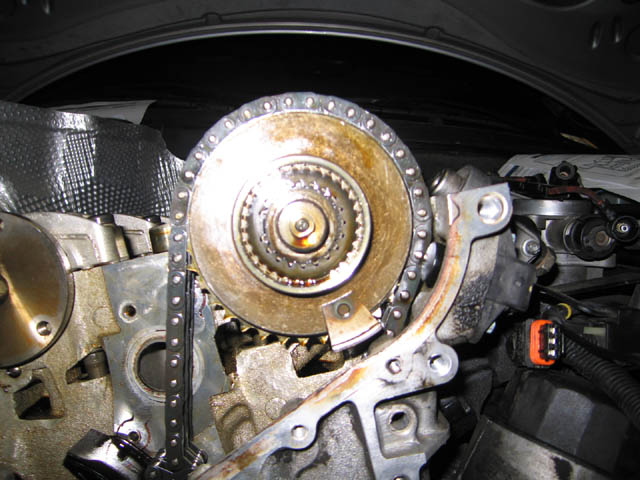 |
| Disassembled , mounting bolts shown(3) | 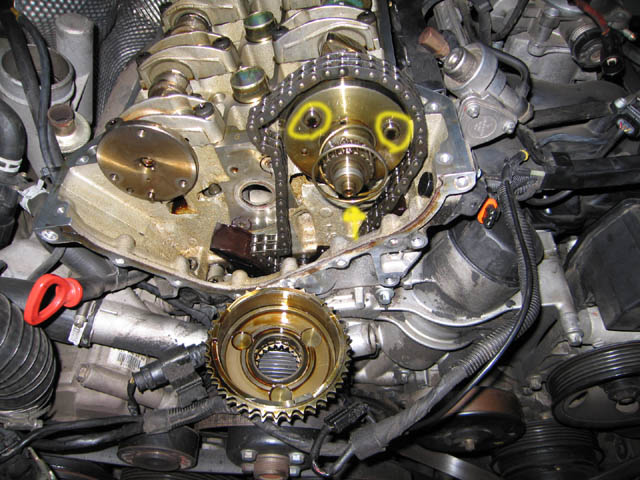 |
| Exploded view | 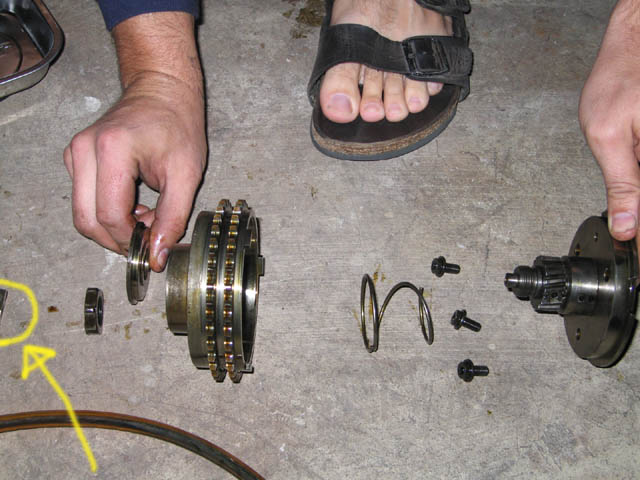 |
The intake camshaft gear assembly is shown in the final picture. Note the direction of the spring and the machined washer in my hand on the left side of the picture. The end bolt that is circled in green on the first picture and the round sleeve are not shown in the fourth picture. I tried to point that out with an arrow and circle.
Exhaust flange bolts |
 |
These exhaust flange bolts were an awkward removal. My craftsman socket did not fit, and I needed to use a wrench. Maybe a flex socket and trying to loosen from below would net different results.
Cylinder Head Bolts |
 |
Removing these bolts is a LOT of effort. More than 135 ft/lbs. do NOT use a 3/8" extension. I broke the hell out of mine and it sliced my wrist. fortunately it didn't cut deeply. the 12-point 'keys' for the head-bolts can be found at Pepboys. Mercedes wanted a LOT and no one had them. The pep-boys ones worked fine.
Top of engine block |
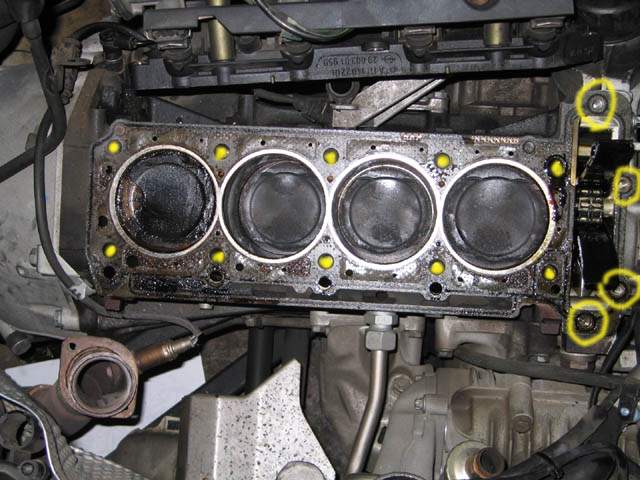 |
FINALLY. its all off. I tried to show the bolt holes with Yellow. It looks pretty good for having 155,003 miles on the engine. Even the factory cylinder score marks were still visible. Good stuff!
| Cylinder 4 | 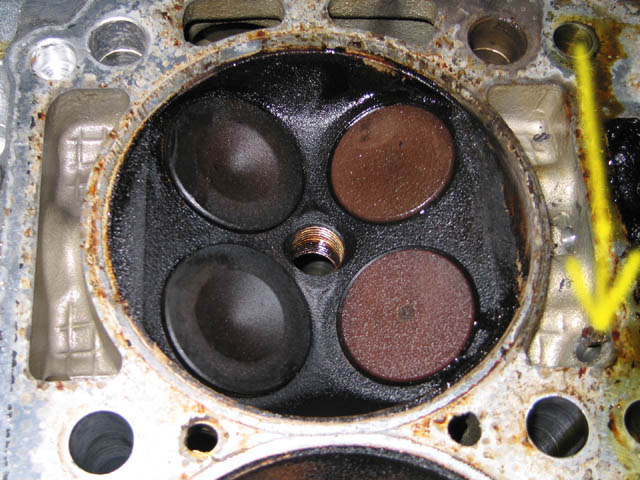 |
| Cylinder 3 | 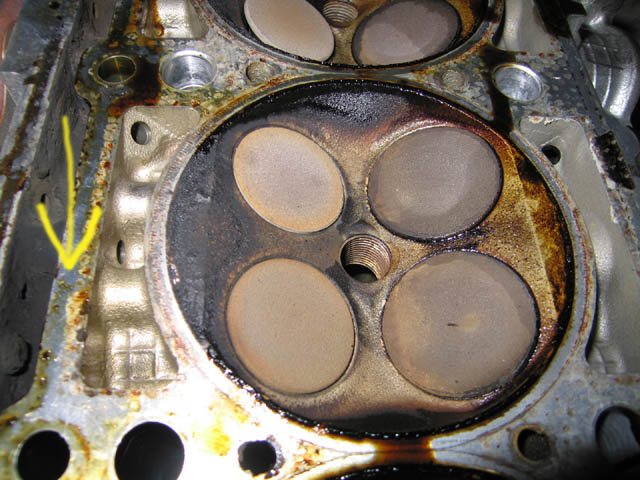 |
| Cylinder 2 | 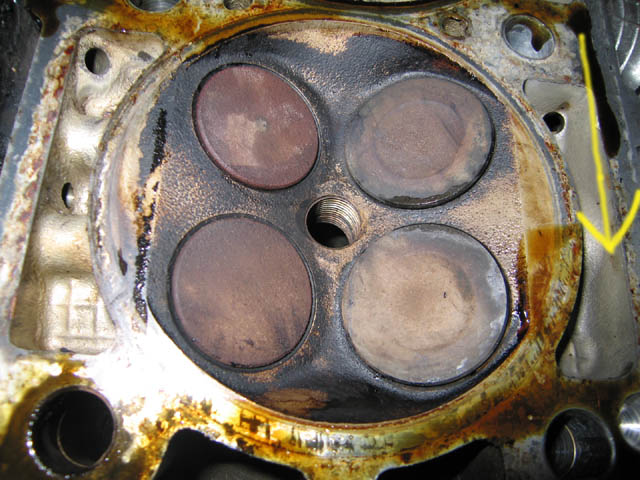 |
| Cylinder 1 | 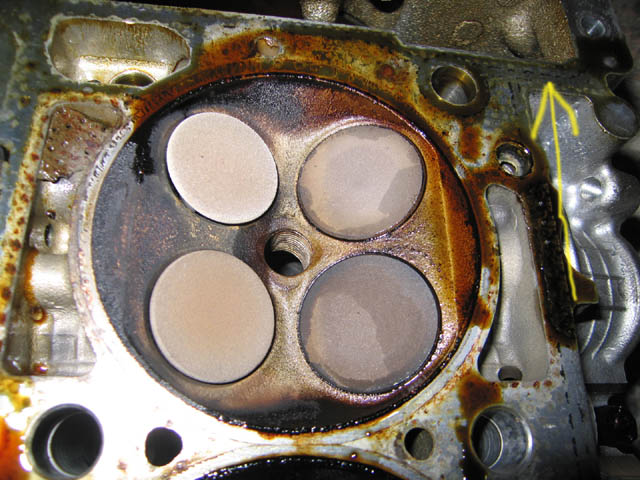 |
Sorry for the orientation problems. The yellow arrow shows the front of the engine.
 |
 |
 |
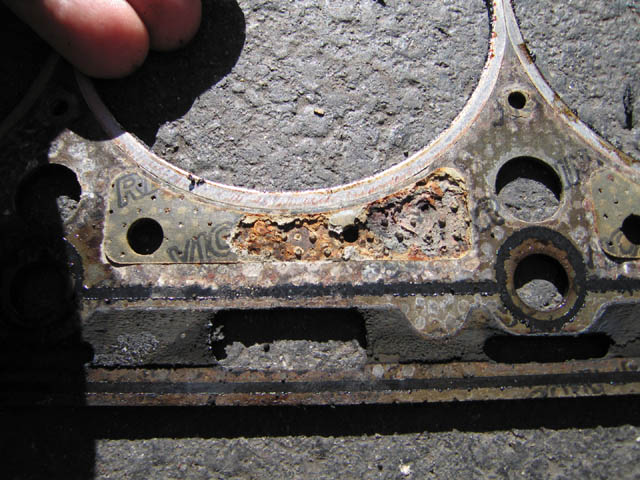 |
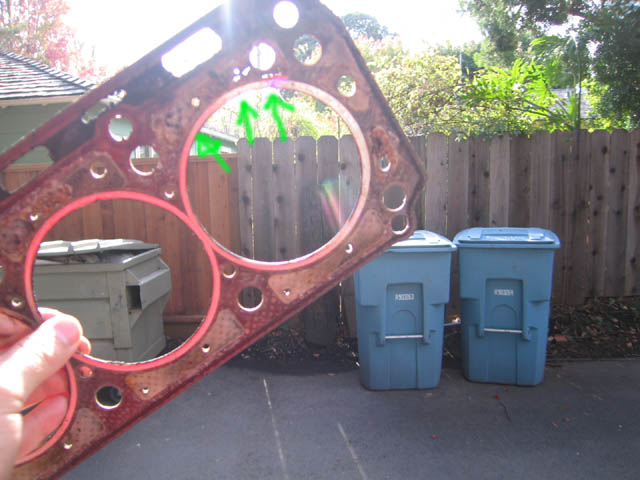
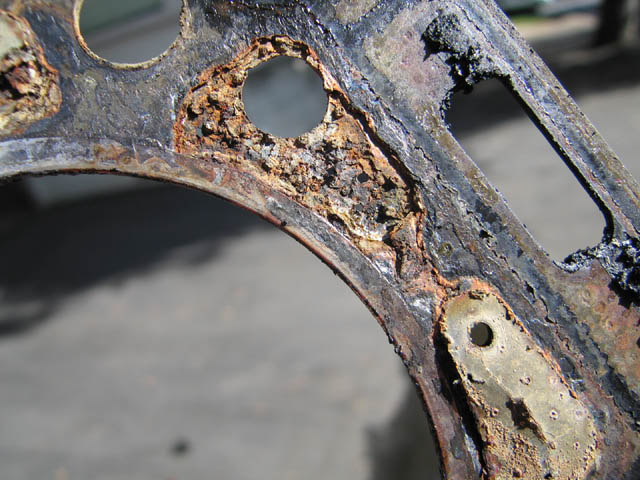
This is the condition of the head gasket when removed. Remember I was getting water in Cylinder 4? I think its because the gasket was RUSTED. Maybe???
Replacement Notes
So, when I began this procedure, I thought it would be a good idea to replace the timing chain since I would already be knee-deep in engine parts. Bad plan. It turns out that the chain doesn't use a clip for its masterlink. Instead, you mushroom the heads on the link with a special tool, that, at the time of this writing, costs $250 from a discount-off-the-back-of-a-truck taiwaneese tool maker. Mercedes wanted more. I couldnt justify the price, and my chain was still in good shape, so I just used the original one.
The replacement procedure is just the reverse of the dissassembly procedure, so I will not go through every step. I will show some highlights and other little important notes to help the replacement go more smoothly for you.
Clean and machined cylinder head. |
 |
Whem replacing the cylinder head gasket, its ESSENTIAL ( especially on an aluminum head) that you have it machined flat. The shop that did this excellent job charged me $40 for machining. I also had them clean it, check it for cracks and do a pressure test on it. My total service bill from them was $102, which is a pretty good price. Keep note, that the black tube on the right side of the picture is some sort of ventalation tube. My original tube cracked at the yellow circles from the rubber being heat-cycled so many times. No sweat. $10 at the MB dealership.
Cylinder Head Gasket |
 |
Make sure to be very meticulous about cleaning the metal surface of the engine block. Any little bits of gasket left will make your head gasket prematurely fail. I spent 2-3 hours with a VERY soft brillow ( non metaillic) pad, a plastic scraper and some spray-on gasket remover. Clean all the journals and any gasket material that may have dropped into the water jackets. The driversides of the oil journals are only 1" deep. the passanger side, however, is much deeper. I nearly lost a Q-tip in the hole. Just be careful!
Intake Manifold Seals |
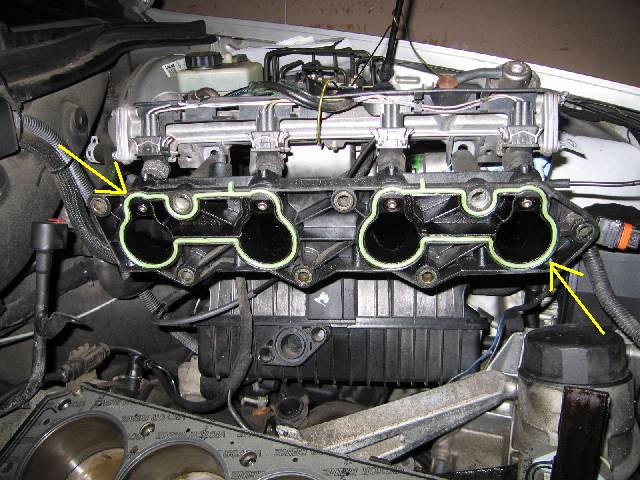 |
The original seals were in pretty good shape. But since they were in the kit, I decided to change them. Its an easy change, just pull them from the tab at the top.
Chain Tensioner Location |
 |
After you bolt on the head in the correct tighting sequence and torque spec, you need to remove the chain tensioner. When you removed the cam sprockets, you released the pre-tension in the system and allowed the tensioner to adjust itself out too far.
Remove the entire assembly. This takes a 27mm socket. sears didnt carry it for me, but I was able to find one at a Napa.
Chain Tensioner Parts |
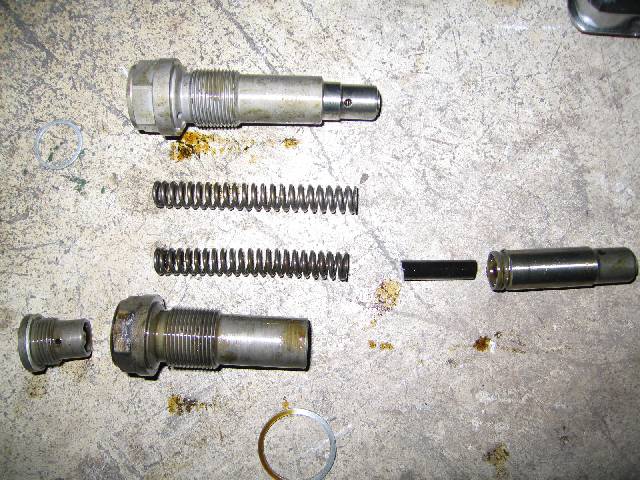 |
The top unit that is assembled is the new tensioner. I removed its internal spring to show that its less worn ( longer) than the older tensioner. The little black piece is some sort of composite that prevents the piston ( on the right of the picture) from compressing too far.
Chain Tensioner -Second Click |
 |
When re-assembling the chain tensioner, its VERY IMPORTANT to note that there is 2 positions for the sliding portion of the tentioner. Shown in this picture is in its "second-click" position. If installed in this position, not only are you superman for getting the cam sprockets in place, the chain will be WAY over tentioned. I made this mistake the first time and couldnt get the engine to turn over with a 18" breaker bar and a socket on the main crank bolt.
Chain Tensioner - First Click |
 |
Now this is the correct position for the slider within the chain tensioner. At this point, do NOT install the central spring and end cap. You would screw the chain tensioner into the engine block, install the timing chain onto the cam sprockets and THEN install the central spring and end cap. I had to wrestle mine in, so dont expect it to be a cakewalk getting that end cap on.
***VERY IMPORTANT PROCEDURE***
1. Disassemble the chain tensioner
2. Slide the central adjuster through the back (where the cap goes) and through till it clicks once. Do Not install spring and cap at this time
3. Install tensioner into block
4. Setup and align timing chain to cam sprockets.
5. Install chain tensioner central spring and end cap and torque to specified values.
6. Install top chain guide.
Chain Tensioner - Misaligned aluminum seal |
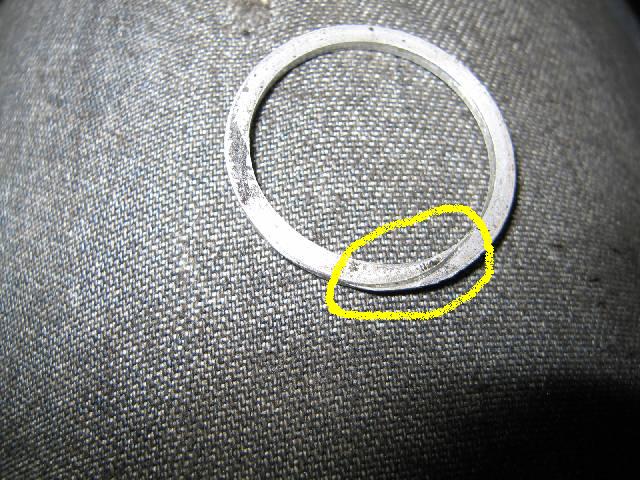 |
While installing the tensioner, I allowed the aluminium seal to rest aginst the smaller-diameter body. It caught and bent the seal as I was screwing it in. This is a pressure location for oil. Since the tensioner is hydraulically adjusted, I had a pretty good oil leak from the groove that was cut into the sirface of this seal. Make sure your seal is constantly seated aginst the tensioner when installing into the block. A little grease will sufficiently hold the seal aginst the face of the tensioner while its being installed.
The rest of the installation went as expected. As long as you go slow and take your time, things should go smoothly. This took me a week, working on it a few hours a night. Taking the pictures really slowed things down a LOT. If I were to do it again, I expect the whole procedure would take about 6-8 hours.
End of Procedure
Below are body-damage shots from being dumb. While removing the head bolts, I was using a 3/8 extension, rather than a 1/2 inch.
Wound - Not So bad |
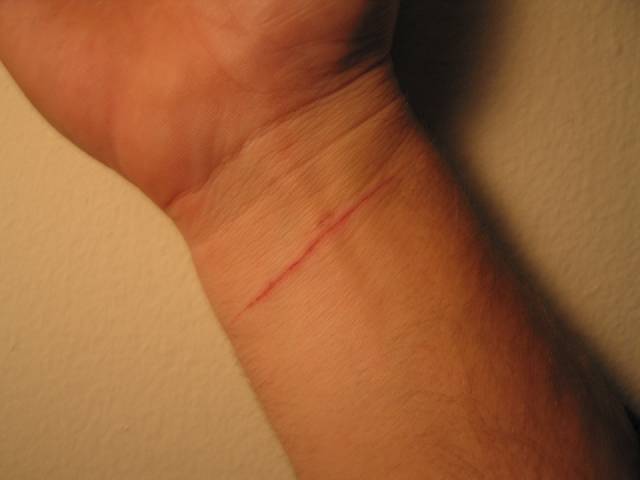 |
And the offending tool. Should I frame it or take it back to Craftsman for a replacement?
Broken Socket Extension |
 |
I hope this is useful to some of you shade-tree mechanics out there. I am always open to comments and sugguestions to try and make this page a little better.
Happy Wrenching!
Updated December 13 , 2006 - benkokes@hotmail.com